
 Tweet
Tweet
I was hoping to get a post up soon. Busy is not the word for the last few weeks. I am almost done with my dads estate and I have been repairing everything from the neighborhood fire tanker truck from freeze damage to my moms subaru wagon so I can give it to my cousin who just had her transmission puke in her car. I don't want to give her a project she can't afford to fix. I believe I am just about caught up. So I took the grills back to the powder coater this last week. I should hear back real soon and will go pick them up. I found a satin black cerakote coating that looks exactly like the black on the grills. I did a compatibility test and it passed with flying colors. Bad PUN eh? The grills are going to be coated with a polyurethane clear. I had to make sure no wrinkling or problems would surface.
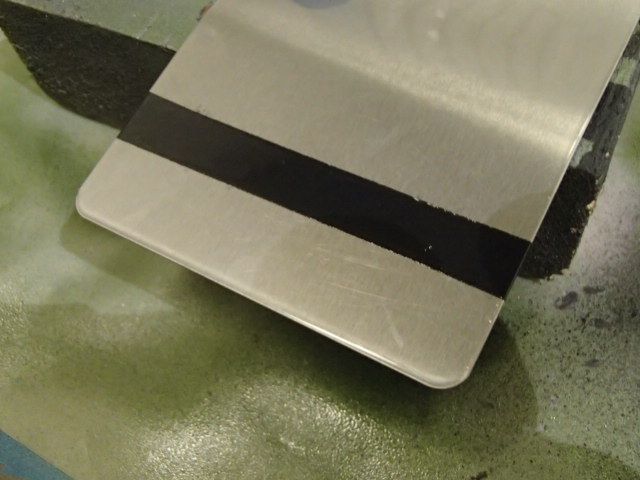
The test card they gave me.
I coated all the grill steel parts with it. According to the BATF using cerakote is gunsmithing activity. So when I say this will be a high caliber wagoneer, I am dead serious.
Now I have been doing a ton of online research and looking for the correct semi tubular rivets to put all the parts back together again. I found a very cool company. They are incredibly helpful and I am still waiting for the recent order I placed for the larger grill rivets. The division bars rivet order I placed for all four doors did come in and he included a ton of samples to see if they would help with the work.
This is the company.

So I proceeded to replace the division bars on the rear doors. Now Team Grand Wagoneer sells these but I am tired of them. I ordered both metro molded parts (# WC-29-72) at 54 bucks, and Standard Products (Y 658X-72) at 33.95 bucks. There is a slight and probably insignificant difference. Standards have longer felts or whiskers.
If you order either or call the company and have them cut the 72 incher in half. You will still cut off about 4 inches for the final product. This will save a bundle on shipping and less chance of UPS ruining it like they like to do.

Metro has shorter whiskers.
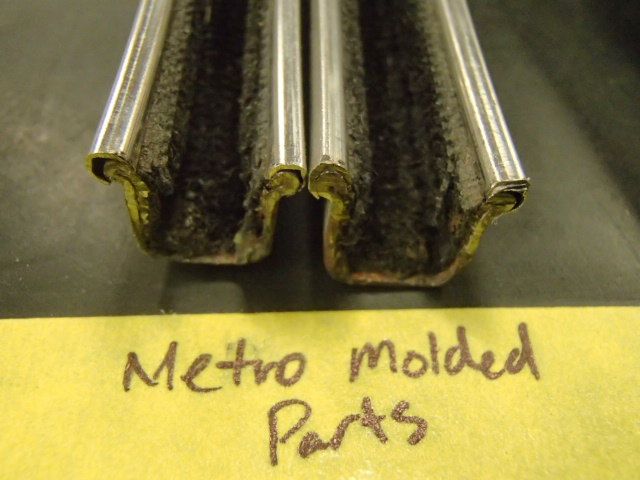
I am putting the Metro division bars on the rear doors because they have extra linkage to make the window raise and lower. The front doors will get the Standard Products because there is only one lifter arm. I did test fit the bars on the windows and there is a slight difference in drag.
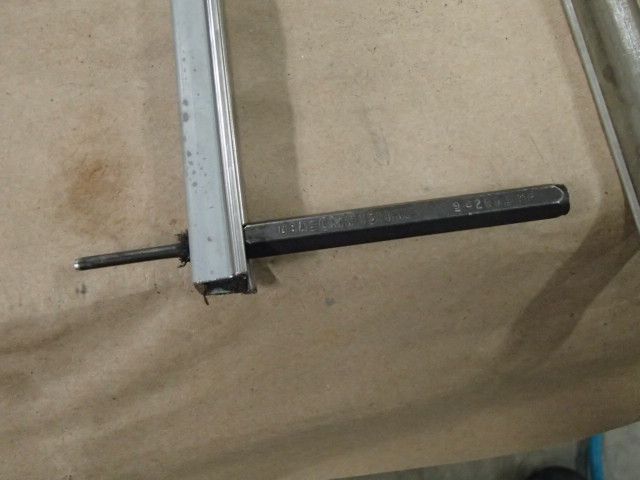
So Using the new brake lining super small semi tubular rivets and a really nice setting tool from Aircraft Spruce, I was able to duplicate the factory roll on the rivets without to much trouble. Jay Cee rivet company did send a setting tool that can be used with a hammer. I discovered the screw type and went after it. It was less than 40 bucks and works like a charm.
Do not bother with the cheaper one. It had bad reviews and this one did not.
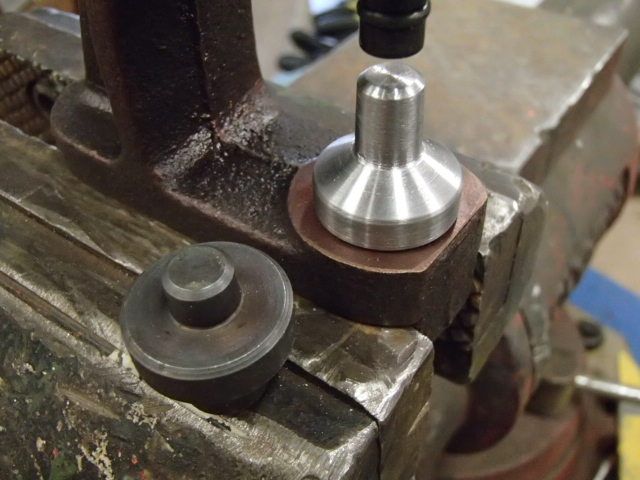
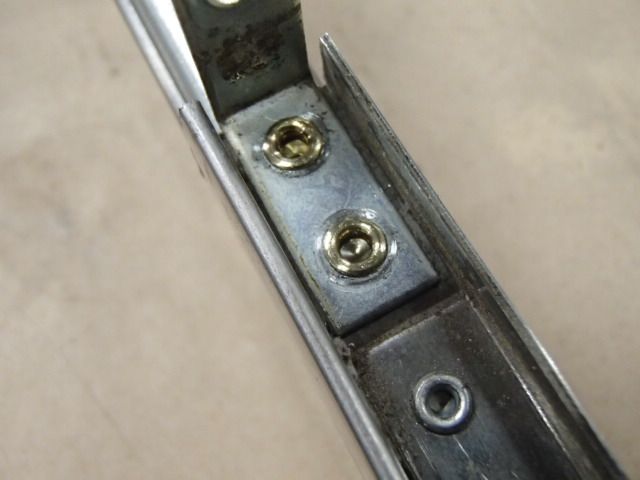
I had to make a taller die to fit inside the division bar channel. I found a ruined riding lawn mower blade spindle that was hardened and it worked perfectly. It took a while with slow machining because it was hardened. But it will and has worked perfectly. The original is on the left.
So I marked and drilled out each hole to the exact same size as factory. I had trouble with the new whiskers being in the way till I figured out I could shear it with a punch and some twisting. It left a perfectly clean hole to insert the rivet in.
And putting it all back together. Look at all those samples they sent me.

So after doing both rear doors and a polish of the stainless on the buffer, I now have two completely rebuilt rear window glass assemblies. Now I need to figure out how to get all this in the door shell without ruining the wide lower glass seal. Trust me I have tried. I will figure it out.

It worked well. Very tight
EDIT: 11/30/19 Rivet part number that I reduced the head size in the lathe is BR4-3B however these should work with no machining, The part number is T140B001870 and it the same basic rivet except has a very slightly crowned head. It should not interfere with the glass. Rivets bought from rivetsonline.com
The rivet tool was bought from aircraft spruce and is in the rivet tools section. You can remove the screw drive rivet set part of the tool and use a ball peen hammer to drive the rivets the tool can't reach.
End of edit....
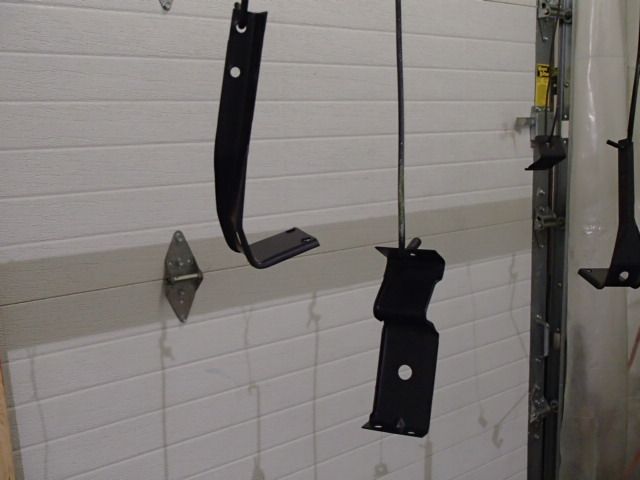
I discovered the rivet tool will not work on the very top part of the front division bars. The angle of the vent glass and frame is in the way of the rivets. I have another tool on the way that I needed for the grill rivets. I hope it fits these. I may have to bend the metal frame part like the rear ones. One of the pictures above shows this minor bend. Except it will be a major bend if that is what I have to do. Hope not.
I have been making a plan for mounting the poly aftermarket gas tank. Sadie arrived at my shop with it. The mounts were not optimum. And I am making a new metal filler pipe out of mandrel bent 1.75 inch 16 GA steel pipe. The filler pipe from the rubber neck to the tank. The original was missing and the factory filler pipe is 1.5 inch with shrunken corners from the factory bender down to about 1 1/4 inch. So hopefully the bigger size and being mandrel bent will flow gas with some respectable speed. I am waiting for that to show up. I ordered some 3/4 gas vent hose from this very cool place. Gas tank parts O Rama!

I also have my eye on a large single round dual inlet and dual outlet muffler for getting the exhaust done soon. It will be mandrel bent 2 1/4 pipe dual exhaust all the way back. Everything needs to be installed before exhaust gets ran. The engine compartment is just about done. I still need to rebuild the 4 barrel Rochester and get the matching air cleaner housing painted. I had to order a 11 MM alternator pulley. The alternator showed up with a 10MM and I ordered a 13MM thinking that was like original. It was to big. Two orders later I got it right. The belt sits like it should now. Same as the crankshaft and water pump pulleys.
I also unwrapped all of the ribbed aluminum panels I bought hoping to get at least one set of tailgate panels. No way as literally all of it was scratched. What a waste. I hope to get the replacement order in soon. And that it is all in good shape.
I need to go scratch all my bug bites now. More later.
The test card they gave me.

I coated all the grill steel parts with it. According to the BATF using cerakote is gunsmithing activity. So when I say this will be a high caliber wagoneer, I am dead serious.

Now I have been doing a ton of online research and looking for the correct semi tubular rivets to put all the parts back together again. I found a very cool company. They are incredibly helpful and I am still waiting for the recent order I placed for the larger grill rivets. The division bars rivet order I placed for all four doors did come in and he included a ton of samples to see if they would help with the work.
This is the company.
So I proceeded to replace the division bars on the rear doors. Now Team Grand Wagoneer sells these but I am tired of them. I ordered both metro molded parts (# WC-29-72) at 54 bucks, and Standard Products (Y 658X-72) at 33.95 bucks. There is a slight and probably insignificant difference. Standards have longer felts or whiskers.
If you order either or call the company and have them cut the 72 incher in half. You will still cut off about 4 inches for the final product. This will save a bundle on shipping and less chance of UPS ruining it like they like to do.

Metro has shorter whiskers.

I am putting the Metro division bars on the rear doors because they have extra linkage to make the window raise and lower. The front doors will get the Standard Products because there is only one lifter arm. I did test fit the bars on the windows and there is a slight difference in drag.
So Using the new brake lining super small semi tubular rivets and a really nice setting tool from Aircraft Spruce, I was able to duplicate the factory roll on the rivets without to much trouble. Jay Cee rivet company did send a setting tool that can be used with a hammer. I discovered the screw type and went after it. It was less than 40 bucks and works like a charm.
Do not bother with the cheaper one. It had bad reviews and this one did not.

I had to make a taller die to fit inside the division bar channel. I found a ruined riding lawn mower blade spindle that was hardened and it worked perfectly. It took a while with slow machining because it was hardened. But it will and has worked perfectly. The original is on the left.

So I marked and drilled out each hole to the exact same size as factory. I had trouble with the new whiskers being in the way till I figured out I could shear it with a punch and some twisting. It left a perfectly clean hole to insert the rivet in.

And putting it all back together. Look at all those samples they sent me.

So after doing both rear doors and a polish of the stainless on the buffer, I now have two completely rebuilt rear window glass assemblies. Now I need to figure out how to get all this in the door shell without ruining the wide lower glass seal. Trust me I have tried. I will figure it out.

It worked well. Very tight

EDIT: 11/30/19 Rivet part number that I reduced the head size in the lathe is BR4-3B however these should work with no machining, The part number is T140B001870 and it the same basic rivet except has a very slightly crowned head. It should not interfere with the glass. Rivets bought from rivetsonline.com
The rivet tool was bought from aircraft spruce and is in the rivet tools section. You can remove the screw drive rivet set part of the tool and use a ball peen hammer to drive the rivets the tool can't reach.
End of edit....
I discovered the rivet tool will not work on the very top part of the front division bars. The angle of the vent glass and frame is in the way of the rivets. I have another tool on the way that I needed for the grill rivets. I hope it fits these. I may have to bend the metal frame part like the rear ones. One of the pictures above shows this minor bend. Except it will be a major bend if that is what I have to do. Hope not.
I have been making a plan for mounting the poly aftermarket gas tank. Sadie arrived at my shop with it. The mounts were not optimum. And I am making a new metal filler pipe out of mandrel bent 1.75 inch 16 GA steel pipe. The filler pipe from the rubber neck to the tank. The original was missing and the factory filler pipe is 1.5 inch with shrunken corners from the factory bender down to about 1 1/4 inch. So hopefully the bigger size and being mandrel bent will flow gas with some respectable speed. I am waiting for that to show up. I ordered some 3/4 gas vent hose from this very cool place. Gas tank parts O Rama!
I also have my eye on a large single round dual inlet and dual outlet muffler for getting the exhaust done soon. It will be mandrel bent 2 1/4 pipe dual exhaust all the way back. Everything needs to be installed before exhaust gets ran. The engine compartment is just about done. I still need to rebuild the 4 barrel Rochester and get the matching air cleaner housing painted. I had to order a 11 MM alternator pulley. The alternator showed up with a 10MM and I ordered a 13MM thinking that was like original. It was to big. Two orders later I got it right. The belt sits like it should now. Same as the crankshaft and water pump pulleys.
I also unwrapped all of the ribbed aluminum panels I bought hoping to get at least one set of tailgate panels. No way as literally all of it was scratched. What a waste. I hope to get the replacement order in soon. And that it is all in good shape.
I need to go scratch all my bug bites now. More later.

")


")


Comment